July 22, 2014
ThingLink is an excellent web tool that allows you to create interactive images online. The images you create can come alive by adding to them text, video, music, and links. ThingLink has also recently rolled out a new feature, which is still in beta, that allows you to add interactive pinmarks to YouTube videos. These pin marks can be links to other videos or websites.
The ability to enrich images with different media content makes ThingLink an ideal tool to incorporate in your instruction. There are a variety of ways you can use ThingLink with your students and the visual below provides 27 examples of activities that students can do using this platform. Click here to access the full visual.

The process to create your first interactive image is pretty basic. Here is how to do it:
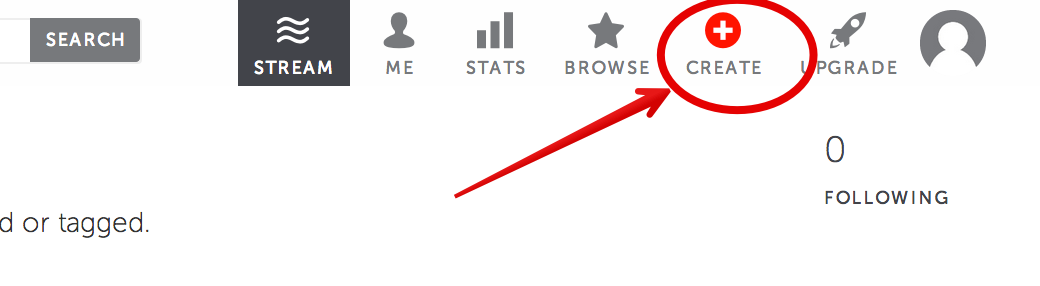
1- First register with ThingLink. You can use the basic account which is free for personal use. Once logged in click on "create"
2- There are four ways to upload an image to your ThingLink account: you can upload one from your hard-drive, import it from Facebook, use a public Flickr image, or use one hosted online.
Keep in mind that the maximum image size is 25MB. And if you are planning to add lots of text to it, make sure you use PNG instead of JPEG images.

3- When your image is uploaded click on " click to add a tag" to start adding content to your image.

2- The content you can add to your image can be links to websites, videos, music, photos and text. To add more content just click anywhere on the image and a pop-up window will appear where you can add in your content.

3- Once your interactive image is ready you can then share it in different ways : via social media outlets, through email, as a direct link or embed HTML code.

Here is an example of how an interactive image created by ThingLink looks like. Hover your mouse over the image to access the links. This ThingLink is created by Dion.

ThingLink is an excellent web tool that allows you to create interactive images online. The images you create can come alive by adding to them text, video, music, and links. ThingLink has also recently rolled out a new feature, which is still in beta, that allows you to add interactive pinmarks to YouTube videos. These pin marks can be links to other videos or websites.
The ability to enrich images with different media content makes ThingLink an ideal tool to incorporate in your instruction. There are a variety of ways you can use ThingLink with your students and the visual below provides 27 examples of activities that students can do using this platform. Click here to access the full visual.
The process to create your first interactive image is pretty basic. Here is how to do it:
1- First register with ThingLink. You can use the basic account which is free for personal use. Once logged in click on "create"
2- There are four ways to upload an image to your ThingLink account: you can upload one from your hard-drive, import it from Facebook, use a public Flickr image, or use one hosted online.
Keep in mind that the maximum image size is 25MB. And if you are planning to add lots of text to it, make sure you use PNG instead of JPEG images.
3- When your image is uploaded click on " click to add a tag" to start adding content to your image.
2- The content you can add to your image can be links to websites, videos, music, photos and text. To add more content just click anywhere on the image and a pop-up window will appear where you can add in your content.
3- Once your interactive image is ready you can then share it in different ways : via social media outlets, through email, as a direct link or embed HTML code.
Here is an example of how an interactive image created by ThingLink looks like. Hover your mouse over the image to access the links. This ThingLink is created by Dion.


